Zoolz MSP: Manage Accounts
As a reseller, you can manage the users under your account by resetting their passwords, changing their emails, suspending their accounts, limiting the storage they have and much more by doing the following:
- Sign in to your Zoolz reseller account.
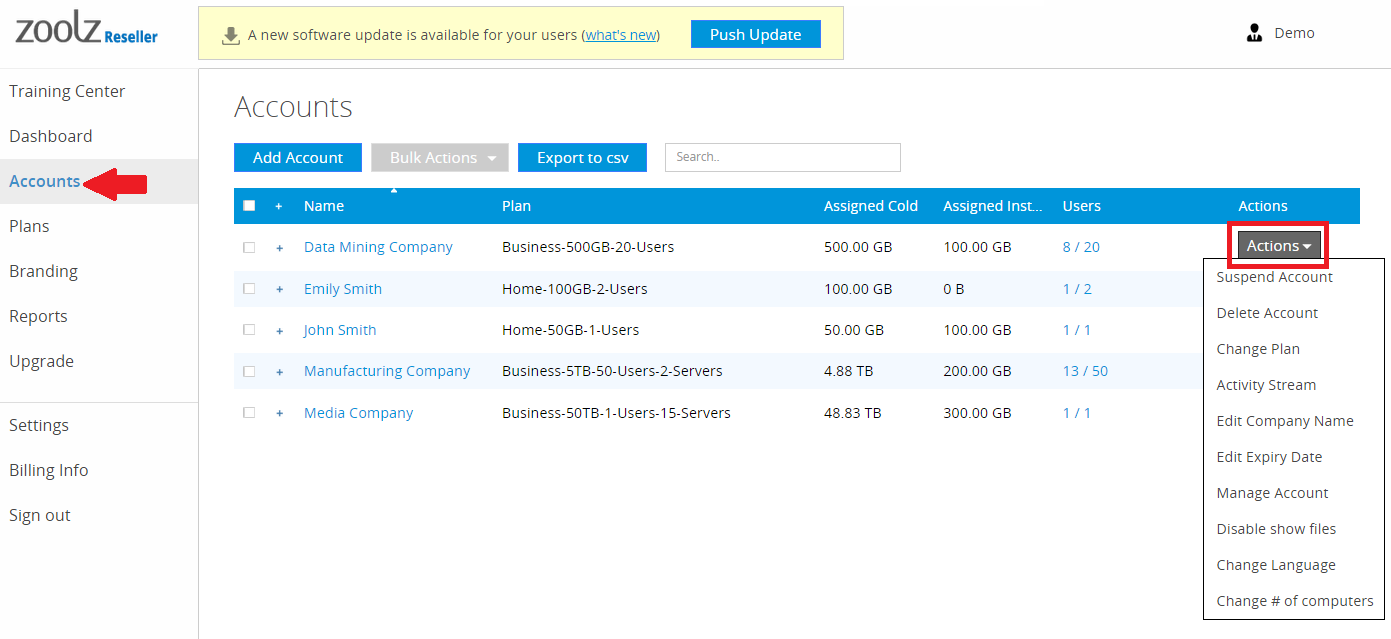
- From the left menu, select Accounts.
- Click on the Actions menu next to the name of the user that you want to edit his/her account. From this menu, you can:
- Suspend Account: Stop the user’s account temporarily.
- Delete Account: Permanently delete the account.
- Change Plan: Change the plan assigned to the user.
- Activity Stream: Get a summary for the user’s activities. (last backup, last restore, etc.)
- Edit Company Name: Change the user’s company’s name.
- Edit Expiry Date: Change the account’s expiry date.
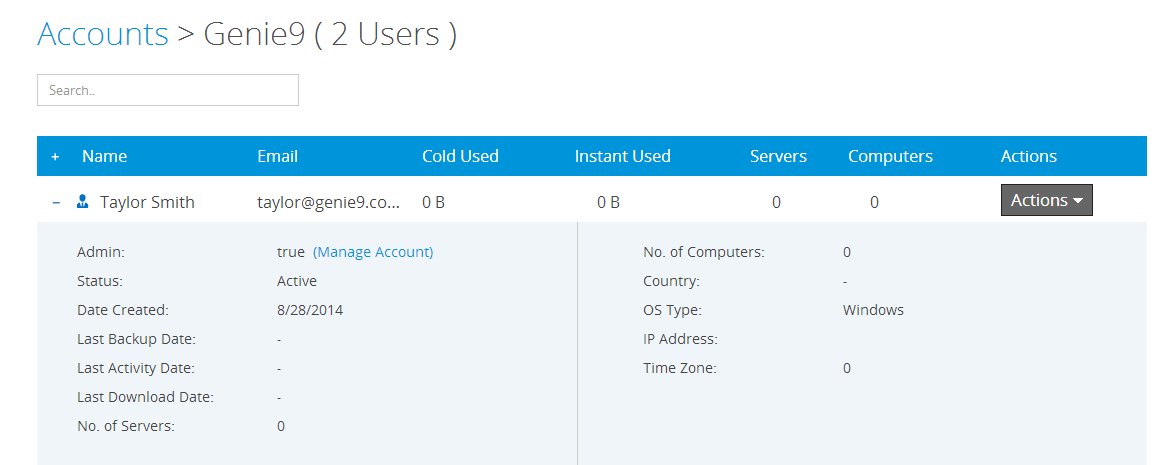
- Manage Account: By selecting this option, you’ll be directed to the account of the admin of this client of yours. From there, you can view all the users he/she added and you can manage them directly from there. However, you’ll not be able to view the backed up files under this account, unless you enabled this option as explained here.
- Disable show files: To prevent the admin of this account from showing the backed up data of the users under his account.
- Change Language: Change the language used for this account.
- Change # of Computers: This option can be used to change the default number of computers each user can back up under his account. The default number of computers for Home plans is 1 computer/user, and the default number of computers for Business plans is 3 computers/user.
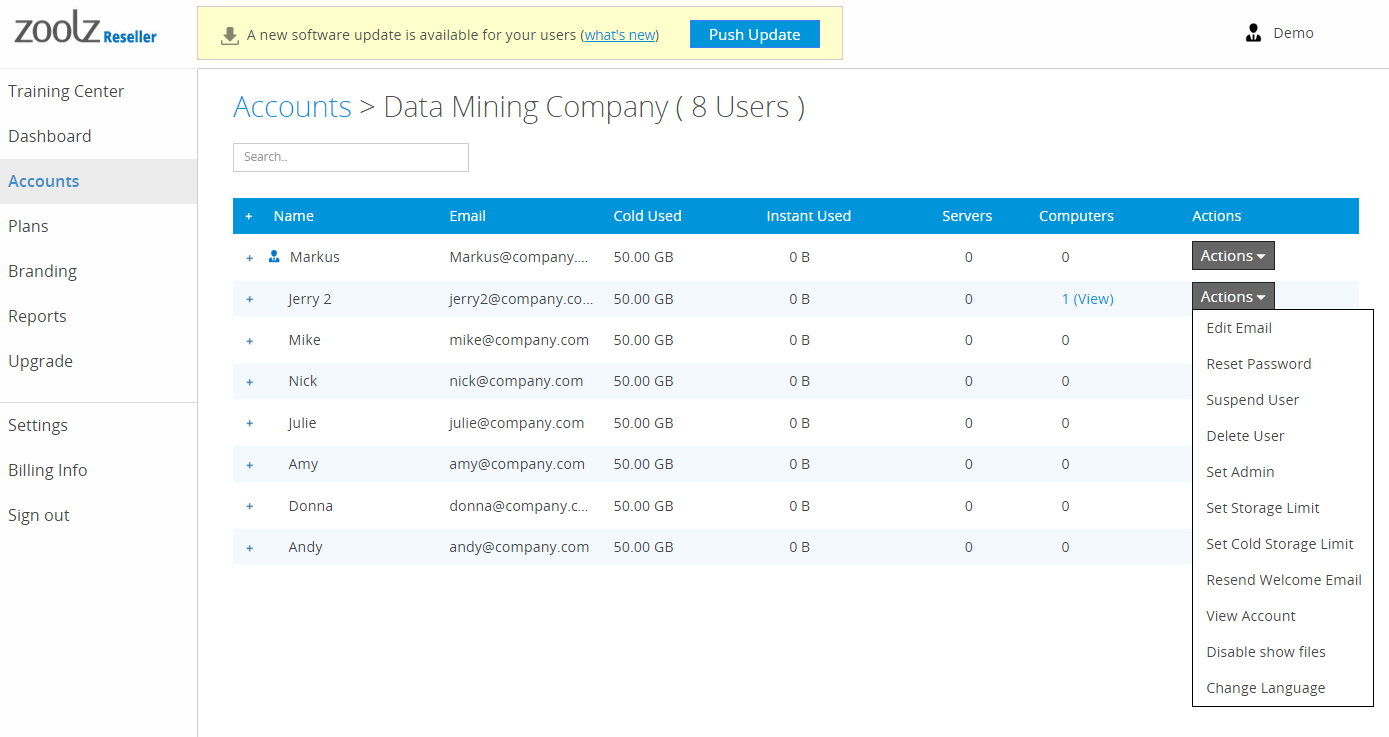
- If you want to change the settings for one of the users under your client’s account, click on the number of users next to the user’s name. A list of all the users under this account will be shown, and there will be an Actions button for each of them.

- Click on the Actions menu for any wanted user in order to:
- Edit Email: To change the user’s email.
- Reset Password: To manually change the user’s password.
- Suspend User: To temporarily stop the user’s account.
- Delete User: To permanently delete the user’s account.
- Set Admin: To give this user admin privileges. If this option is not available in the menu, then this user is already an admin. Admin users can add sub users, servers and set policy in the business plans.
- Set Storage Limit: To set the amount on Instant Storage this user can use.
- Set Cold Storage Limit: To set the amount on Cold Storage this user can use.
- Resend Welcome Email: To send the welcoming email to the user’s again.
- Manage Account: This option will be available if the user is an admin. By selecting this option, you’ll be directed to the account of the admin. From there, you can view all the users he/she added and you can manage them directly from there. However, you’ll not be able to view the backed up files under this account, unless you enabled this option as explained here.
- View account: This option will be available if the user is an admin. By selecting this option, you’ll be directed to the account of this user.
- Disable Show files: To prevent the user from showing the backup of the other users under this account.
- Change Language: Change the language used for the account of this user.
- If you click on the plus sign (+) next to the user’s name, you will be able to see more information, like how many servers added under this user account, if this user is an admin or not, etc.