Introduction
This comprehensive guide outlines the process for deploying Zoolz to domain users through Active Directory. This deployment option is available exclusively to Business subscribers and provides a streamlined method for setting up Zoolz across multiple users in a domain environment. Before proceeding, ensure that your server meets the specified requirements and that the necessary roles and features are properly configured.
Server Requirements
- Windows Server Edition: 2003 or higher, with the necessary roles and features installed and configured.
- Required Roles:
- Active Directory Domain Services
- DNS Server
- Required Features:
- Group Policy Management
- Remote Server Administration Tools
- .NET Framework 3.5.1 Features
How to Deploy Zoolz via Active Directory
Step 1. Sign in to your Zoolz web console as an admin user.
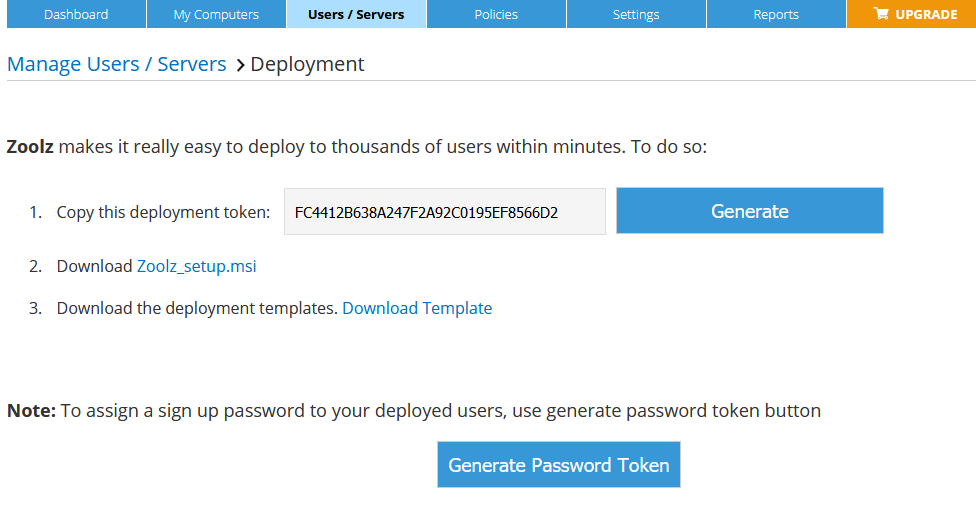
Step 2. Navigate to the Users / Servers page and click on the AD Deployment button.
Step 3. Copy the Deployment Token. Download the Zoolz MSI file (Zoolz_setup.msi) and the Deployment templates (ZoolzSetupADM.exe). Ensure the downloaded Zoolz_setup.msi is stored in a shared location accessible to all your domain users.
Step 4. Execute the Zoolz ADM setup (ZoolzSetupADM.exe). In the setup window, choose either Deploy User’s Policy or Deploy Machine’s Policy. For this example, select Deploy Machine’s Policy. After completion, a Zoolz ADM file will be added to the C:\Windows\INF directory.
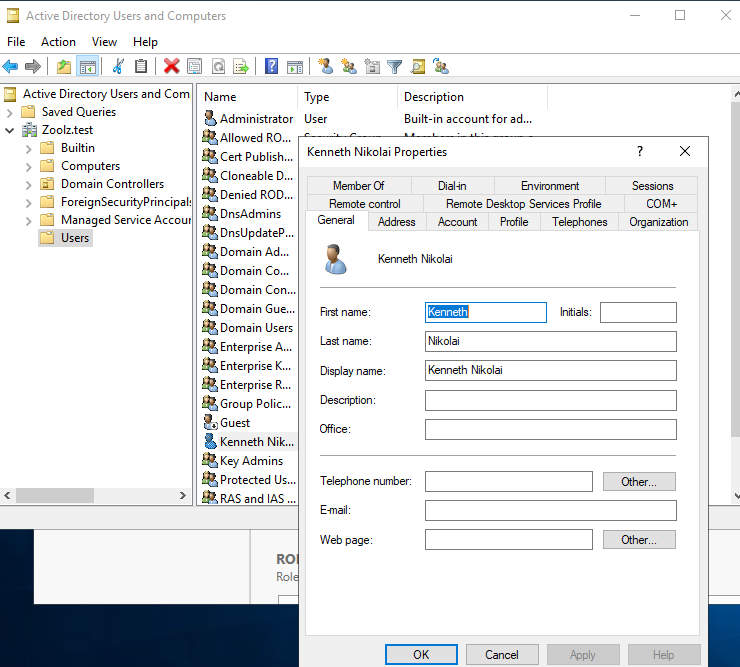
Step 5. Open Active Directory Users and Computers on your server. Verify that all users you wish to set up with Zoolz are listed under Users in your domain. Ensure each user has an email address entered; if the email field is blank, Zoolz will auto-fill it as username@domain.
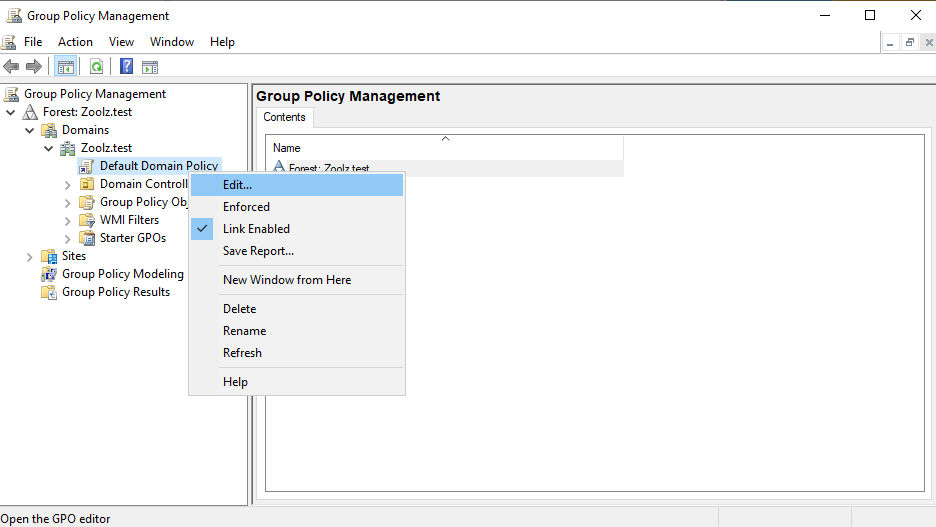
Step 6. Open Group Policy Management. Expand the Domains tree, right-click the Default Domain Policy, and select Edit.
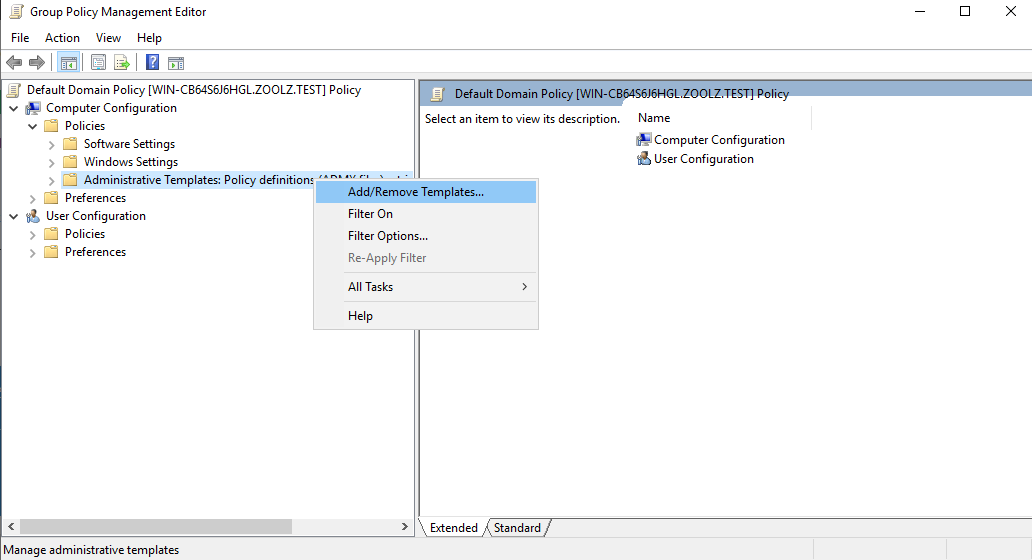
Step 7. In the Group Policy Management Editor window, navigate to Computer Configuration → Policies → Right-click Administrative Templates → Add/Remove Templates.
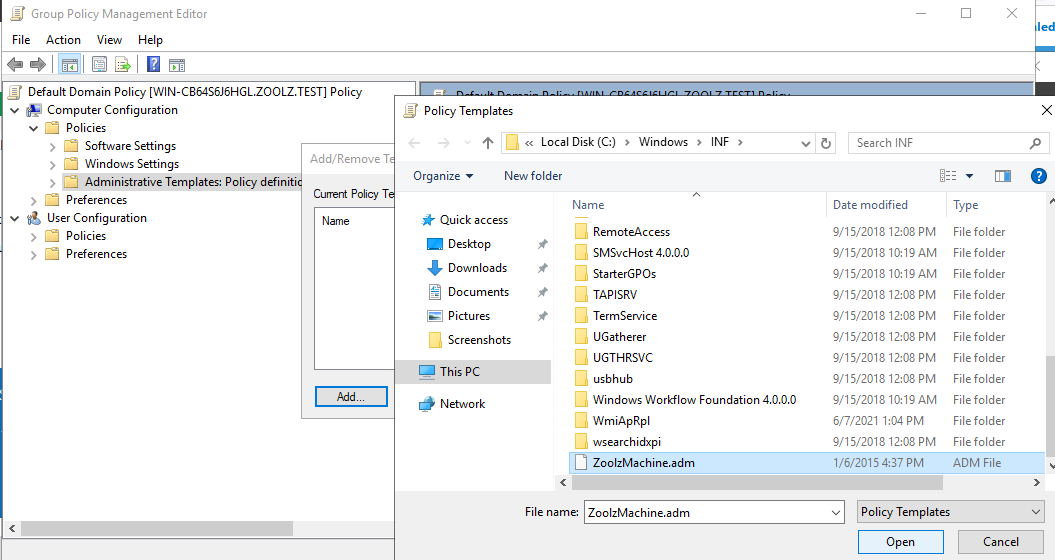
Step 8. In the dialog that appears, click Add, select the Zoolz ADM file from C:\Windows\INF, click Open, and then Close.
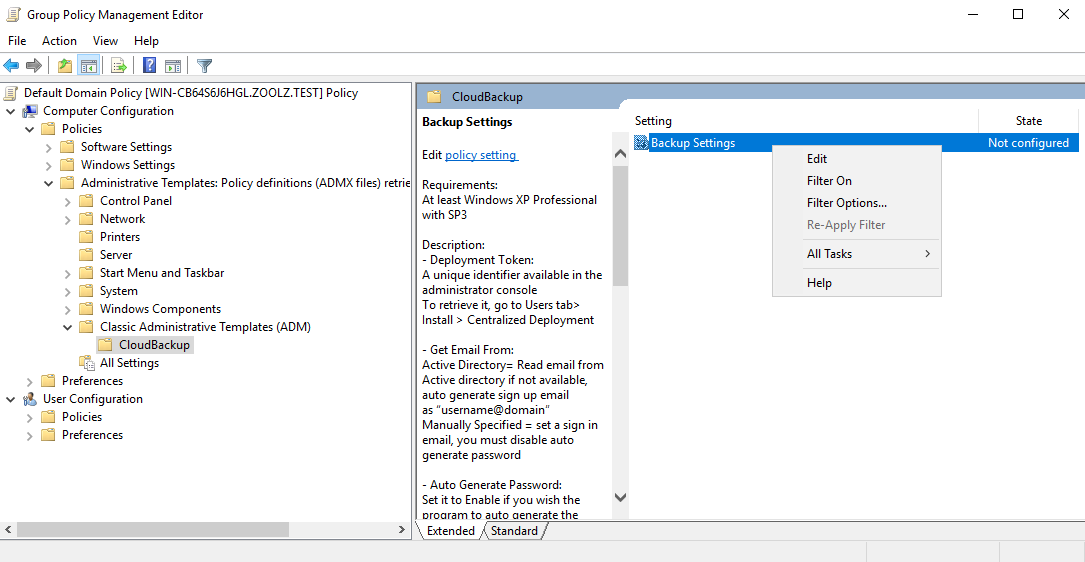
Step 9. Under Administrative Templates, locate the Classic Administrative Template (ADM). For Windows 2003, you will directly see the CloudBackup entry. Double-click Classic Administrative Template → Cloud Backup, then double-click Backup Settings in the right column or right-click and select Edit.
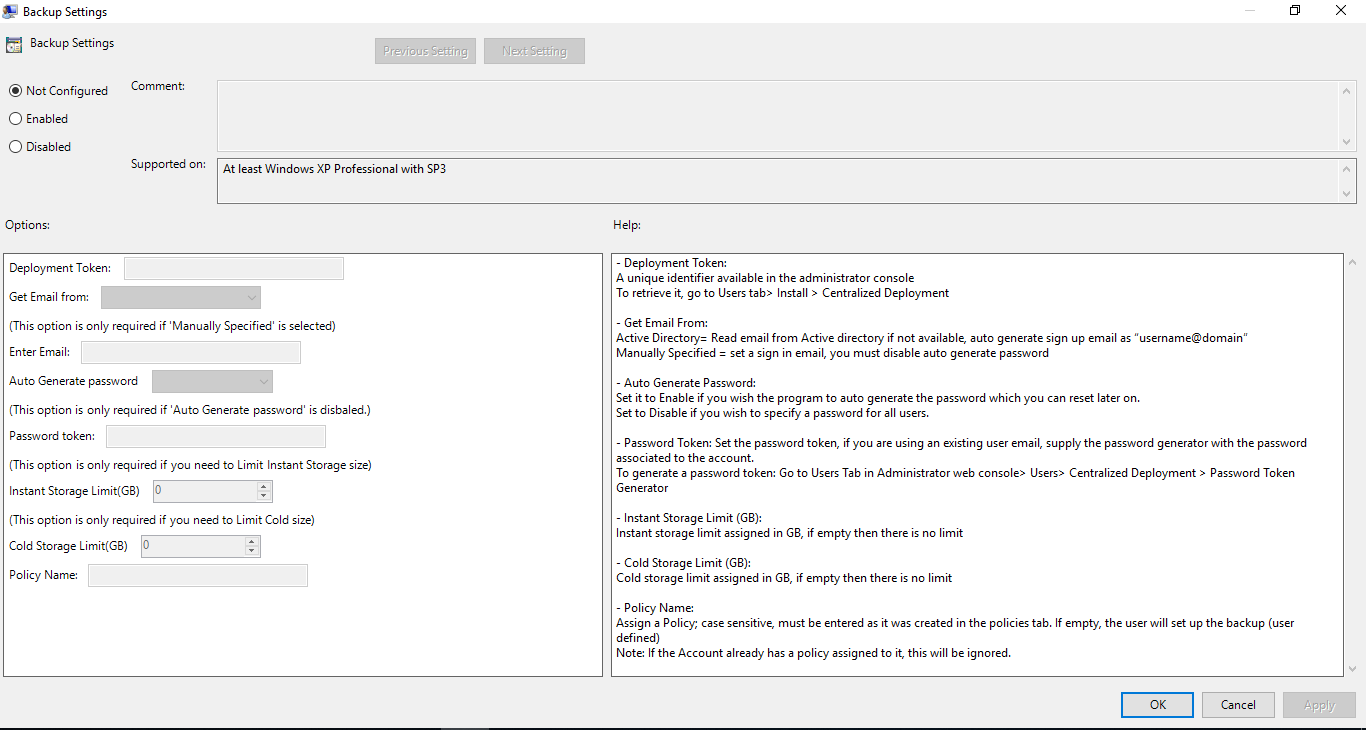
Step 10. In the Backup Settings window, select Enabled. Enter the Deployment Token copied in Step 3 and fill in the necessary information. Click Apply, then OK.
Step 11. To push the MSI installer to domain users, open Group Policy Management, expand the Domains tree, right-click the Default Domain Policy, and select Edit.
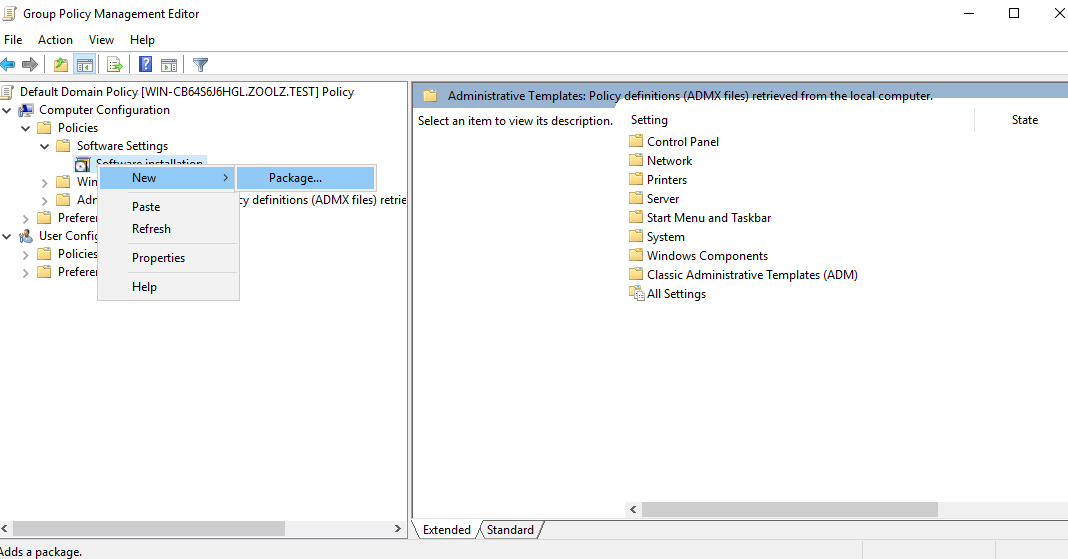
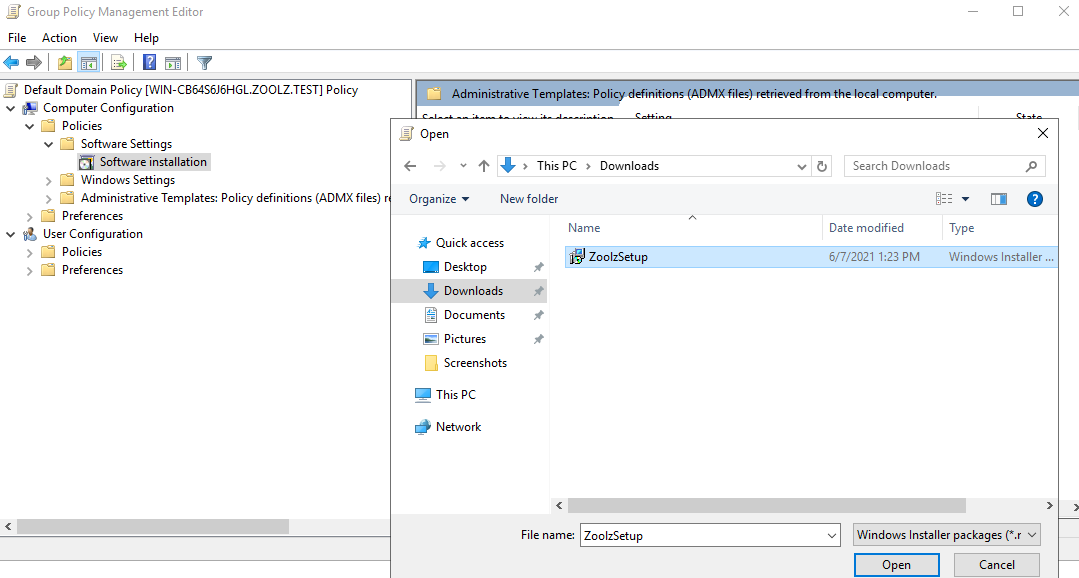
Step 12. In the Group Policy Management Editor window, navigate to Computer Configuration → Policies → Software Settings → Software Installation. Right-click New → Package.
Step 13. Browse to the location of the Zoolz_setup.msi file, select it, press Open, and select Assigned as the default in the next dialog.
Step 14. The MSI installation will now be pushed to all users in your domain, along with the Zoolz settings.